People were well aware about the WordPress themes but they were not familiar with WordPress. To install WordPress theme on your system, you should know what WordPress is. WordPress is a program or a provider on which you can setup your website. After installing WordPress, now you’re able to install WordPress theme in your website. Without WordPress, you can’t install WordPress theme in your website. At begging time, I was also not familiar with WordPress and having issues regarding its installation, so the first thing for a beginner should know how to install WordPress on localhost to discover it’s unique options and features that it has.
WordPress is not only a CMS but provides a platform for build your own blog as well as share your ideas and skills with your friends. We devote this article for every WordPress beginner, who’re willing to work with it. We’ll hope that you will install WordPress on your PC without facing an issue and build your own website with it. If you’re willing to install WordPress on your system then you must have server and you can create your own server by using wamp. Without a server you were not able to install WordPress on your machine. The main function of server is to support PhP and MySQL, moreover you can use any webserver of your choice but we’re using wamp server here.
WordPress is not only a CMS but provides a platform for build your own blog as well as share your ideas and skills with your friends. We devote this article for every WordPress beginner, who’re willing to work with it. We’ll hope that you will install WordPress on your PC without facing an issue and build your own website with it. If you’re willing to install WordPress on your system then you must have server and you can create your own server by using wamp. Without a server you were not able to install WordPress on your machine. The main function of server is to support PhP and MySQL, moreover you can use any webserver of your choice but we’re using wamp server here.
Intalling WordPress Using WAMP Server
- For installing wordpress using wamp server, you have to follow some steps which are mentioned down here and are as follow:
- As I mentioned above, for installing WordPress you need a webserver. Here I used wamp software to create my own server. So firstly you need to download wamp server latest version from its official website as well as from other downloading website. WAMP means Windows Apache MySQL and PHP.
- For extra you need to be careful while installing wamp, means other services (webservers) should be deactivate otherwise wamp server will not install properly.
- After downloading wamp server open download folder and double click on .exe file to start installing wamp server on your system.
- Before installing wordpress you need remember that whenever you turn on your system, you need to activate wamp server by clicking on its icon, which will displayed on your system desktop after installing it.
- How would you able to know that the wamp is active? It’s simple, after double clicking on icon, you’ll see green “W” at taskbar of your system. If its colour is red, it means that it’s still not active.
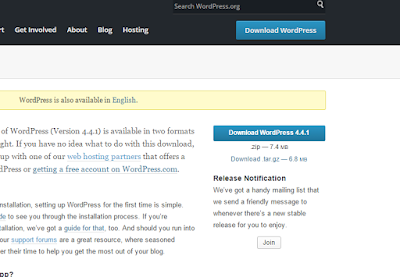
- When your wamp server is active, now you need to download WordPress zip file from WordPress.Com easily.
- Un zip the WordPress.zip file and copy the WordPress folder and past it in “www” folder which is present in Local Disk c >wamp> www. When you past the folder, renamed the folder like “WordPress10”.
- Building multiple copies of WordPress with different names will prevent you to download WordPress again and again.
- Now open your web browser in windows and type following address in address bar “localhost/phpmyadmin/” and beet the enter button. You’ll see a new page, from there select database > create a database for WordPress which contains table as show in picture. After putting username, just click on create and your database is ready.
- After creating database now go to USER and click on “add user” which is given in data base and click on it. You’ll see page a and fill all the blank spaces like username, host, password and check all in privilege box and click add user.
- Now open new window in your web browser and write localhost/wordpress and new page will open in front of your screen.
- Fill the all blanks spaces database name (the name you use for database), username (the one is used in add user), password (the one you used in add user), database host (localhost) and leave prefix section as it is.
- Remember you need to write as it is, as you used in database and add user section. After filling all the blank spaces just click on submit.
- You’ll see another page in which you need to click on “Run the install”.
- A new page came in front of you and fill again all the blank space such as Title page, username (this is the login user name so you can choose any name you can remember easily), Password (you can choose any password as you like but not the previous one you used in “add user”), Email Address (from here you can recover your username and password) and click on again “install wordpress”. Wait for while, so your system installs wordpress on wamp server and last you’ll see congratulation page and login button.
- Form login button you can login to your wordpress account and start discovering its unique features and option and enjoy it.
- We hope that, this article will helpful for you and facing any issue just contact with us. Thanks.. :)


0 Response to "Install WordPress Using WAMP Server (Latest Technique) With Video Tutorial"
Post a Comment